Welding wires and nappes
Broken prongs and damaged wires are among the most common repair tasks in goldsmithing. This tutorial shows how such damage can be repaired precisely and gently using the PUK – from simple preliminary exercises with round wire to the correct preparation of the wire ends and the safe welding of broken prongs. Thanks to the targeted heat input of micro TIG technology, socket work can be repaired without having to expose stones.
1. Preparation
Before attempting to weld broken prongs back on, you should do a few preliminary exercises with round wire (e.g. Au 585).
Straighten the wire ends with a file.
The resulting burr can be welded in as additional material.

2. Prepare electrode
The electrode should always be well ground so that the joint can be touched precisely.
ACHTUNG! The first spot weld should be made on a test piece with a freshly ground electrode in order to work in the electrode. The other spot welds will then be more even.

3. Connect the wire ends
Hold the wires so that the wire ends are positioned exactly next to each other. Then place the electrode tip vertically on the joint and set a welding spot with low to medium power and a short pulse time.

4. Set spot welds
To achieve the most durable weld possible, the wires can be pressed together slightly during welding. This creates a slight thickening, making the weld more stable.
Take care not to select a welding power that is too low. The welding points should penetrate at least half the wire thickness.

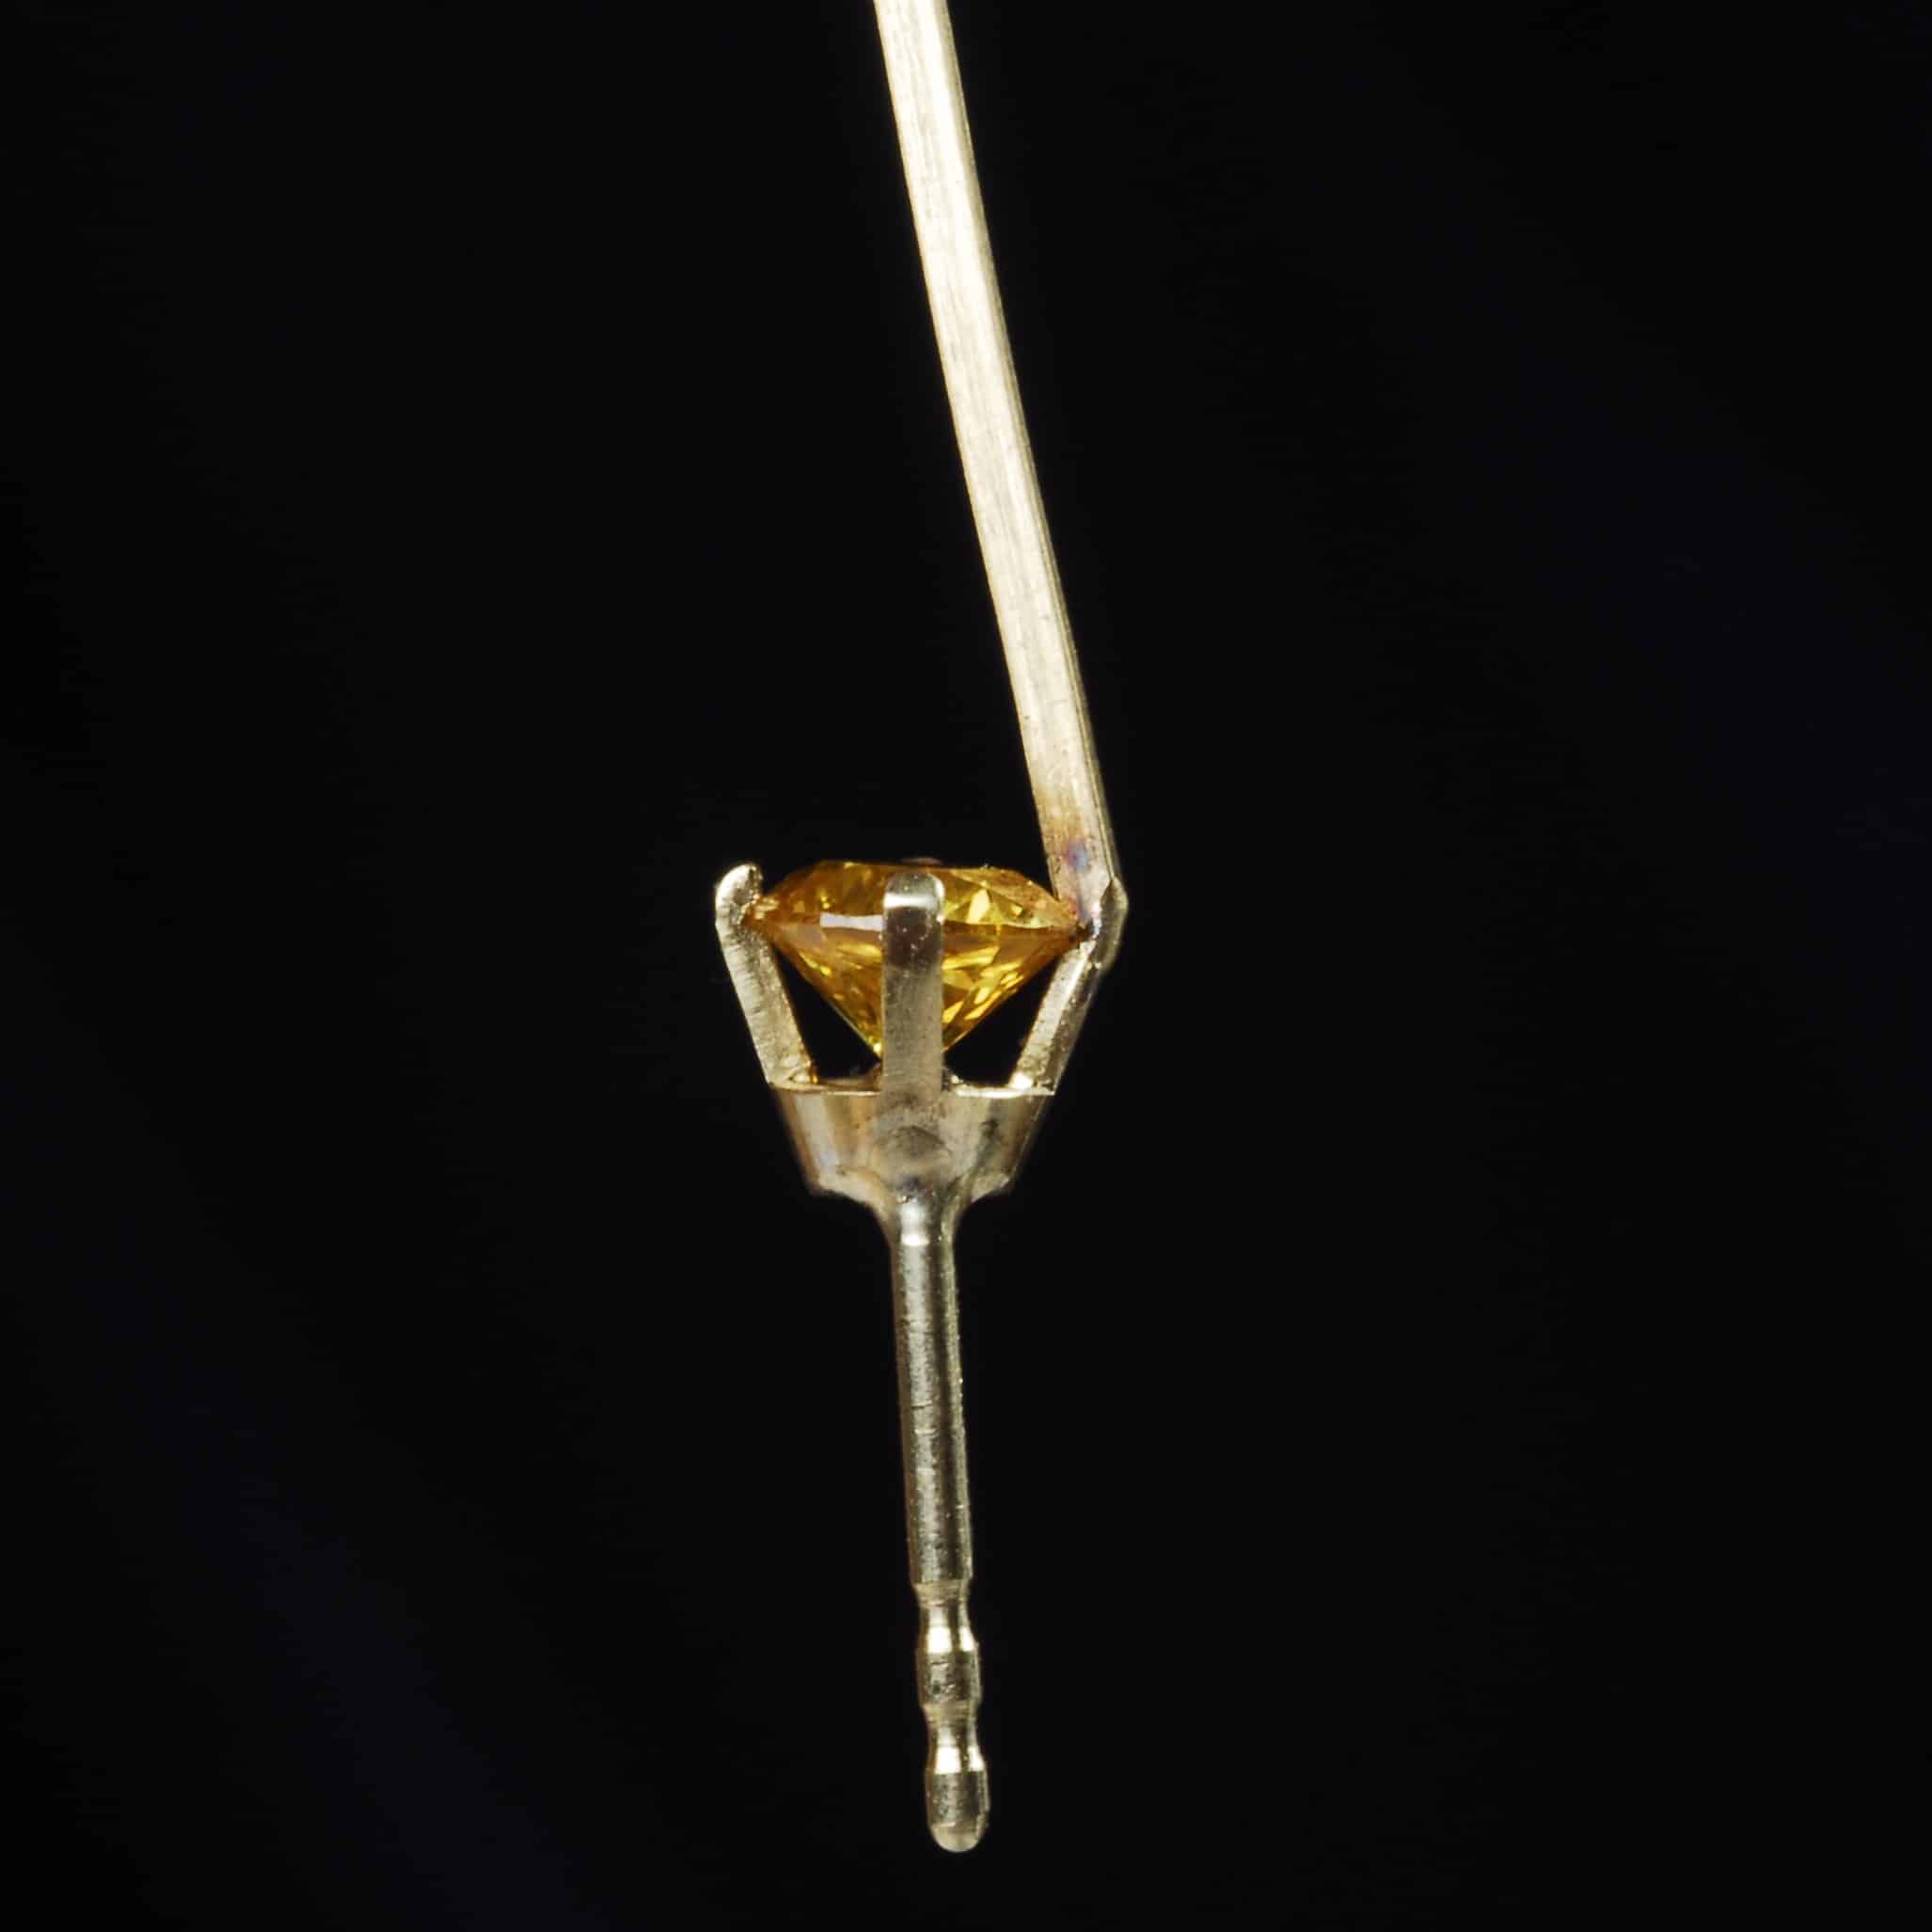
5. Lengthening a claw: Preparation I
File a wire of the same alloy and thickness into the correct shape. This can vary greatly depending on where the prong has broken off. Leave the resulting burr as additional material. Mögliche Formen könnten sein: 
6. Lengthening a claw: Preparation II
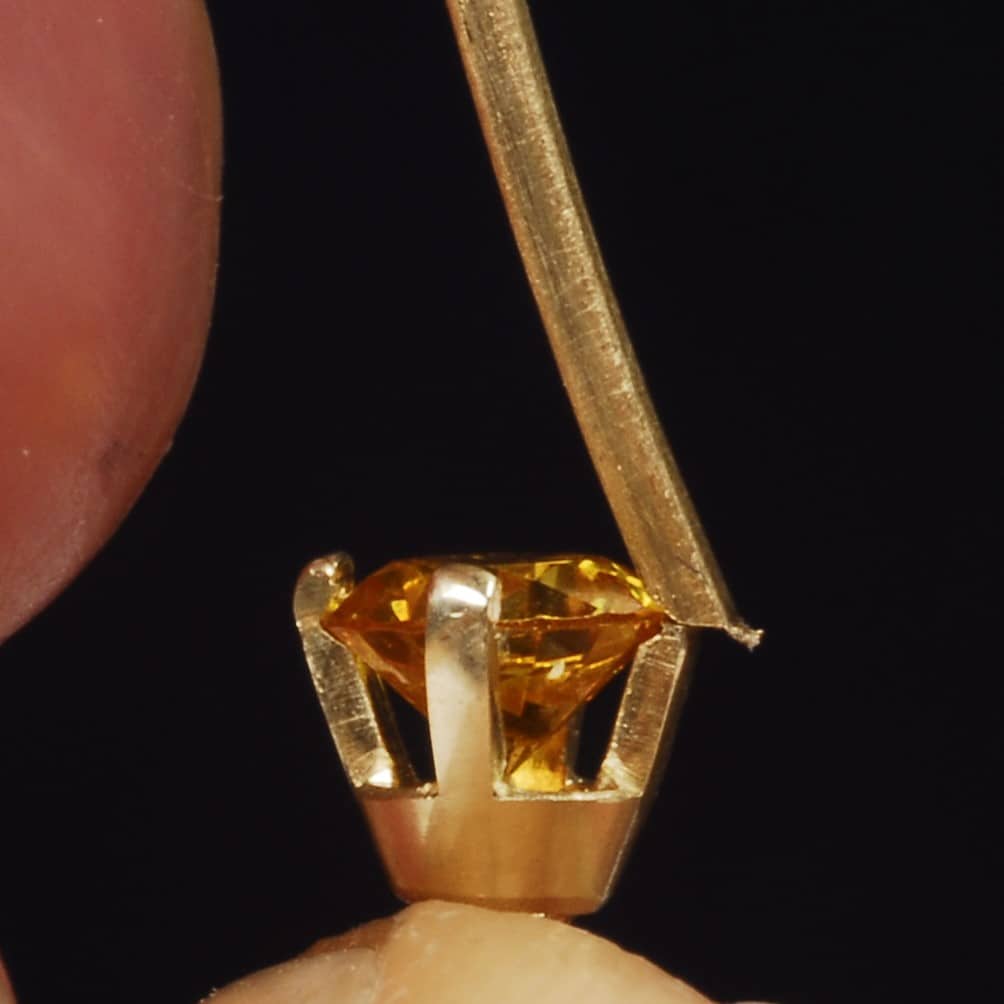
Always try to file the wire so that it protrudes slightly above the stone. This means you will have to bend it less later. The wire should be softly annealed, which makes it easier to touch up. Also file the broken claw to fit.
7. Start welding
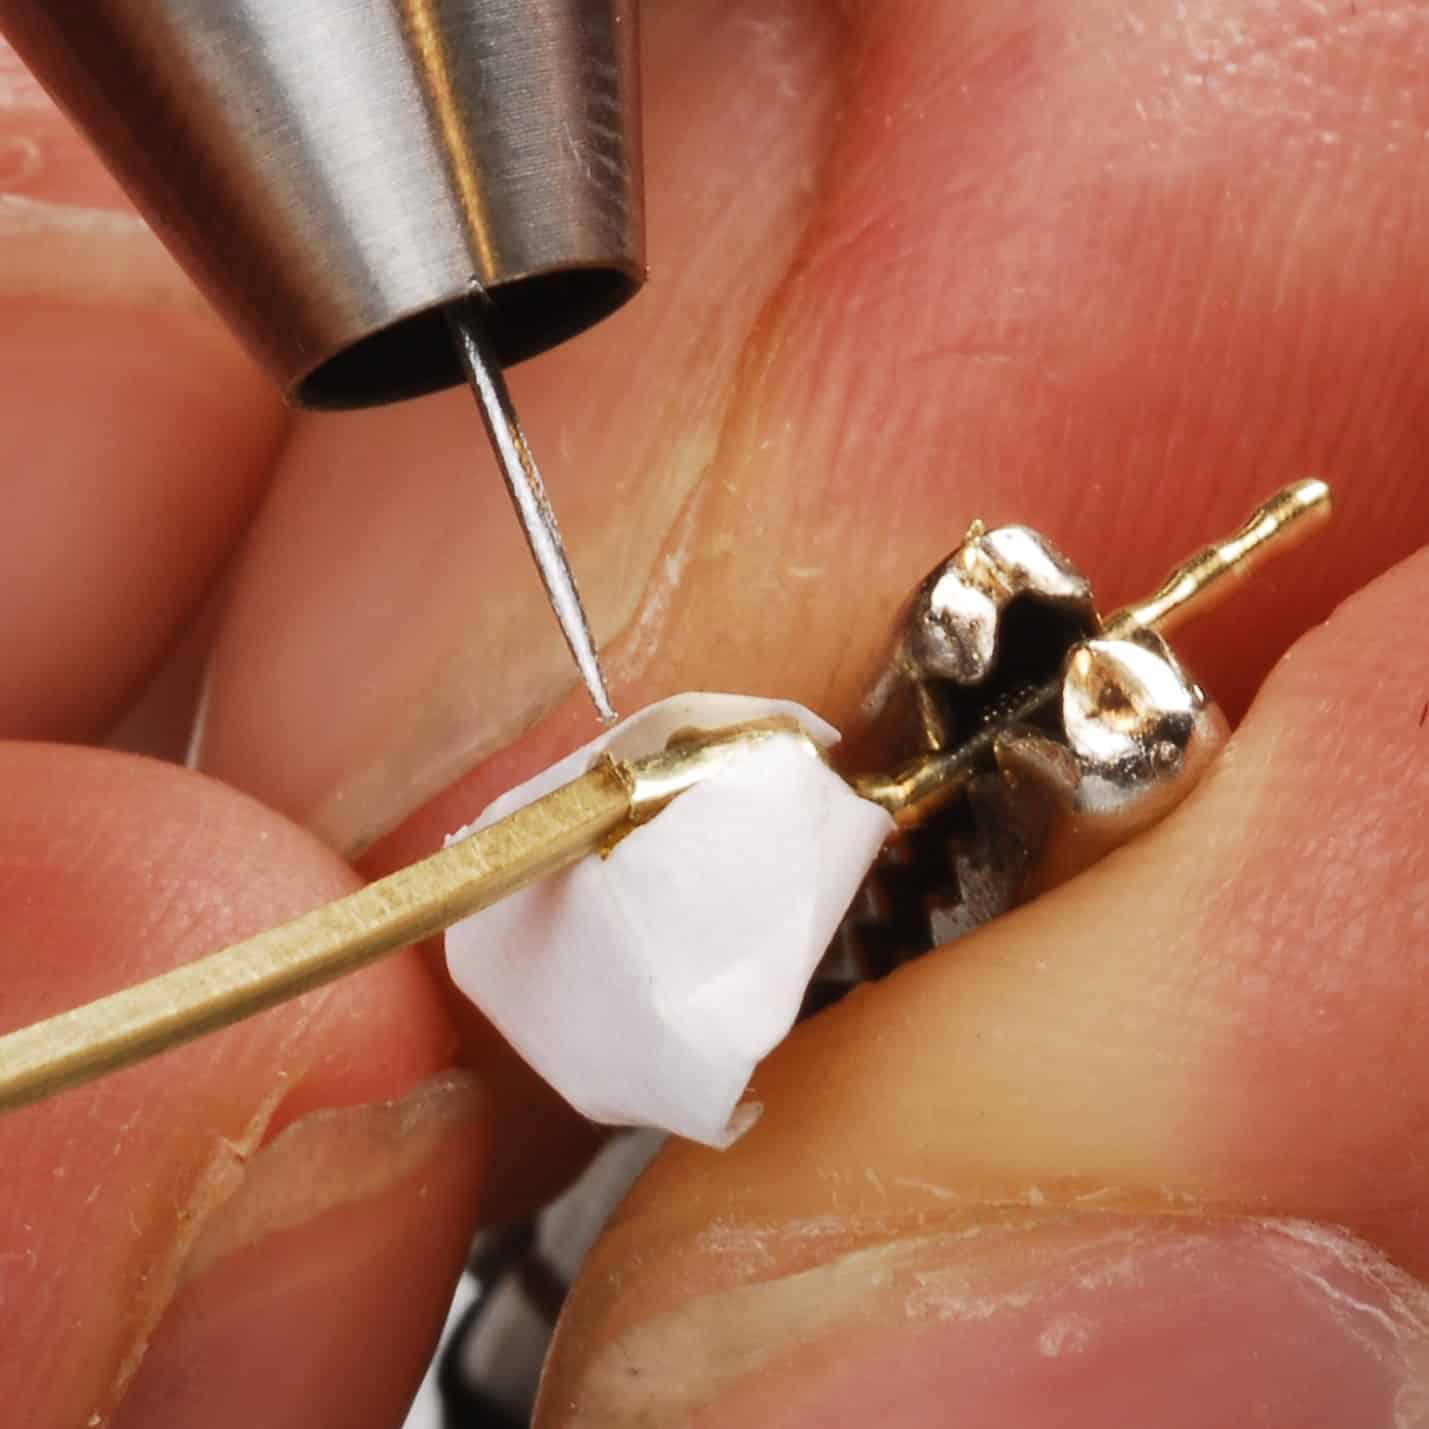
Remember that the wire is now much thinner where you want to weld it. Bear this in mind when selecting the welding power! If you cover the stone with some adhesive tape, you will avoid soiling. To minimize damage to the stone, always weld with the shortest possible pulse duration. Always start work with low power and increase the power gradually if necessary. Please note that too much power can endanger the stone.
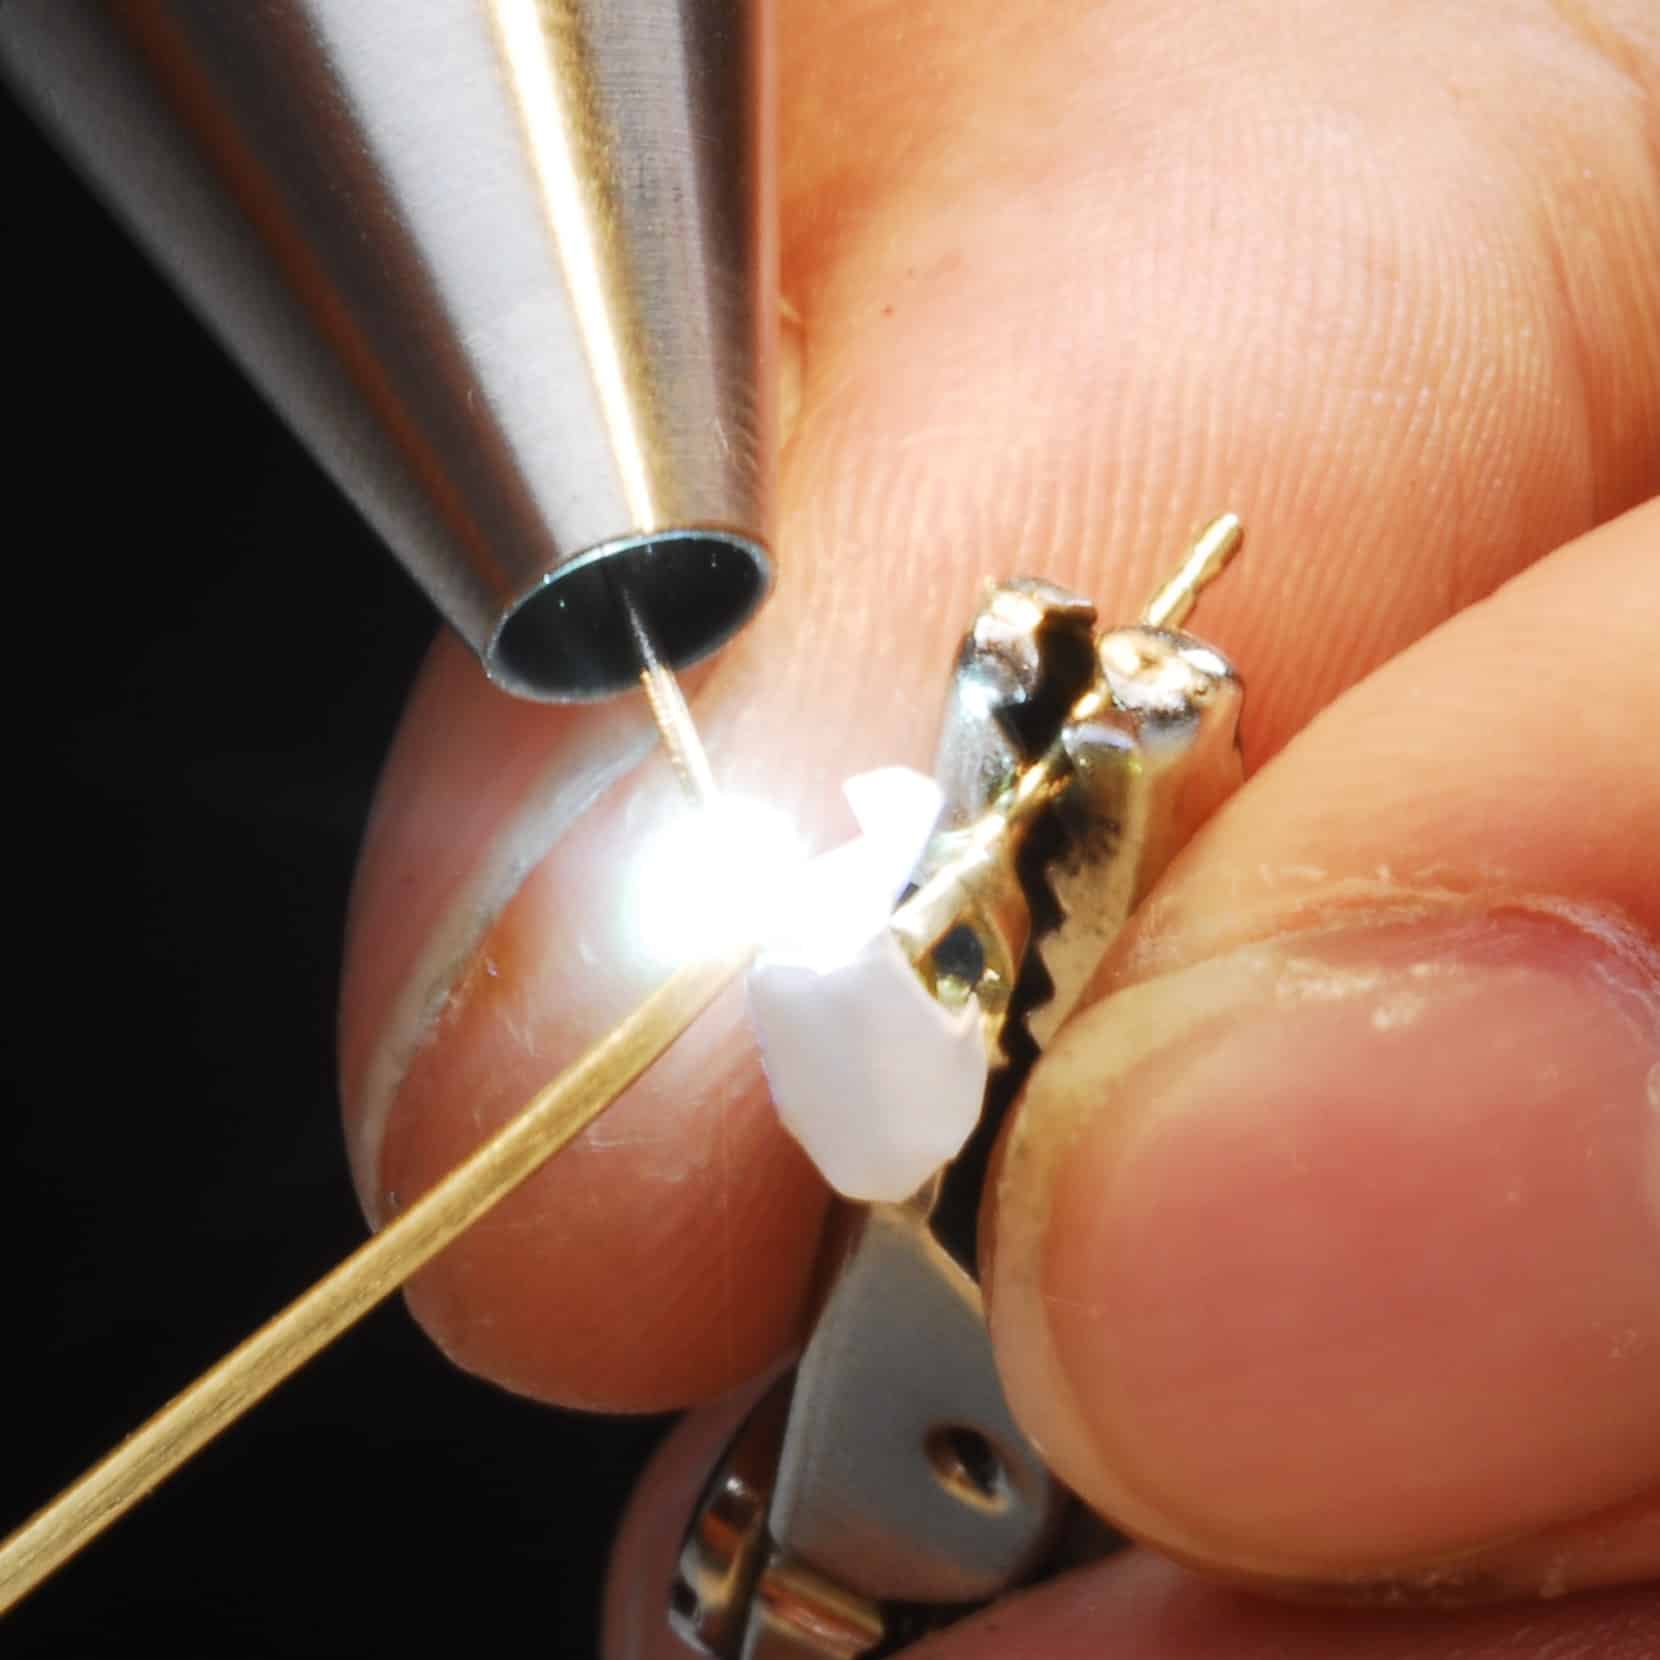
7. Finish work
If possible, work from the outside, i.e. the electrode must not move towards the stone during welding. Check the temperature of the stone with your finger after each welding point and allow the workpiece to cool down if necessary. Finish the work by cleaning and regripping the stone.