
Welding solid prongs
Solid dome frames can be produced much more precisely with micro TIG welding technology than with conventional soldering – because the frame parts are first tacked with a few targeted welding points and precisely aligned before the final connection is made. This tutorial takes you step by step through the entire process: from preparing the frame parts to tacking and aligning them to the final welding with the PUK.
1. Preparation
The frame parts are manufactured as usual.
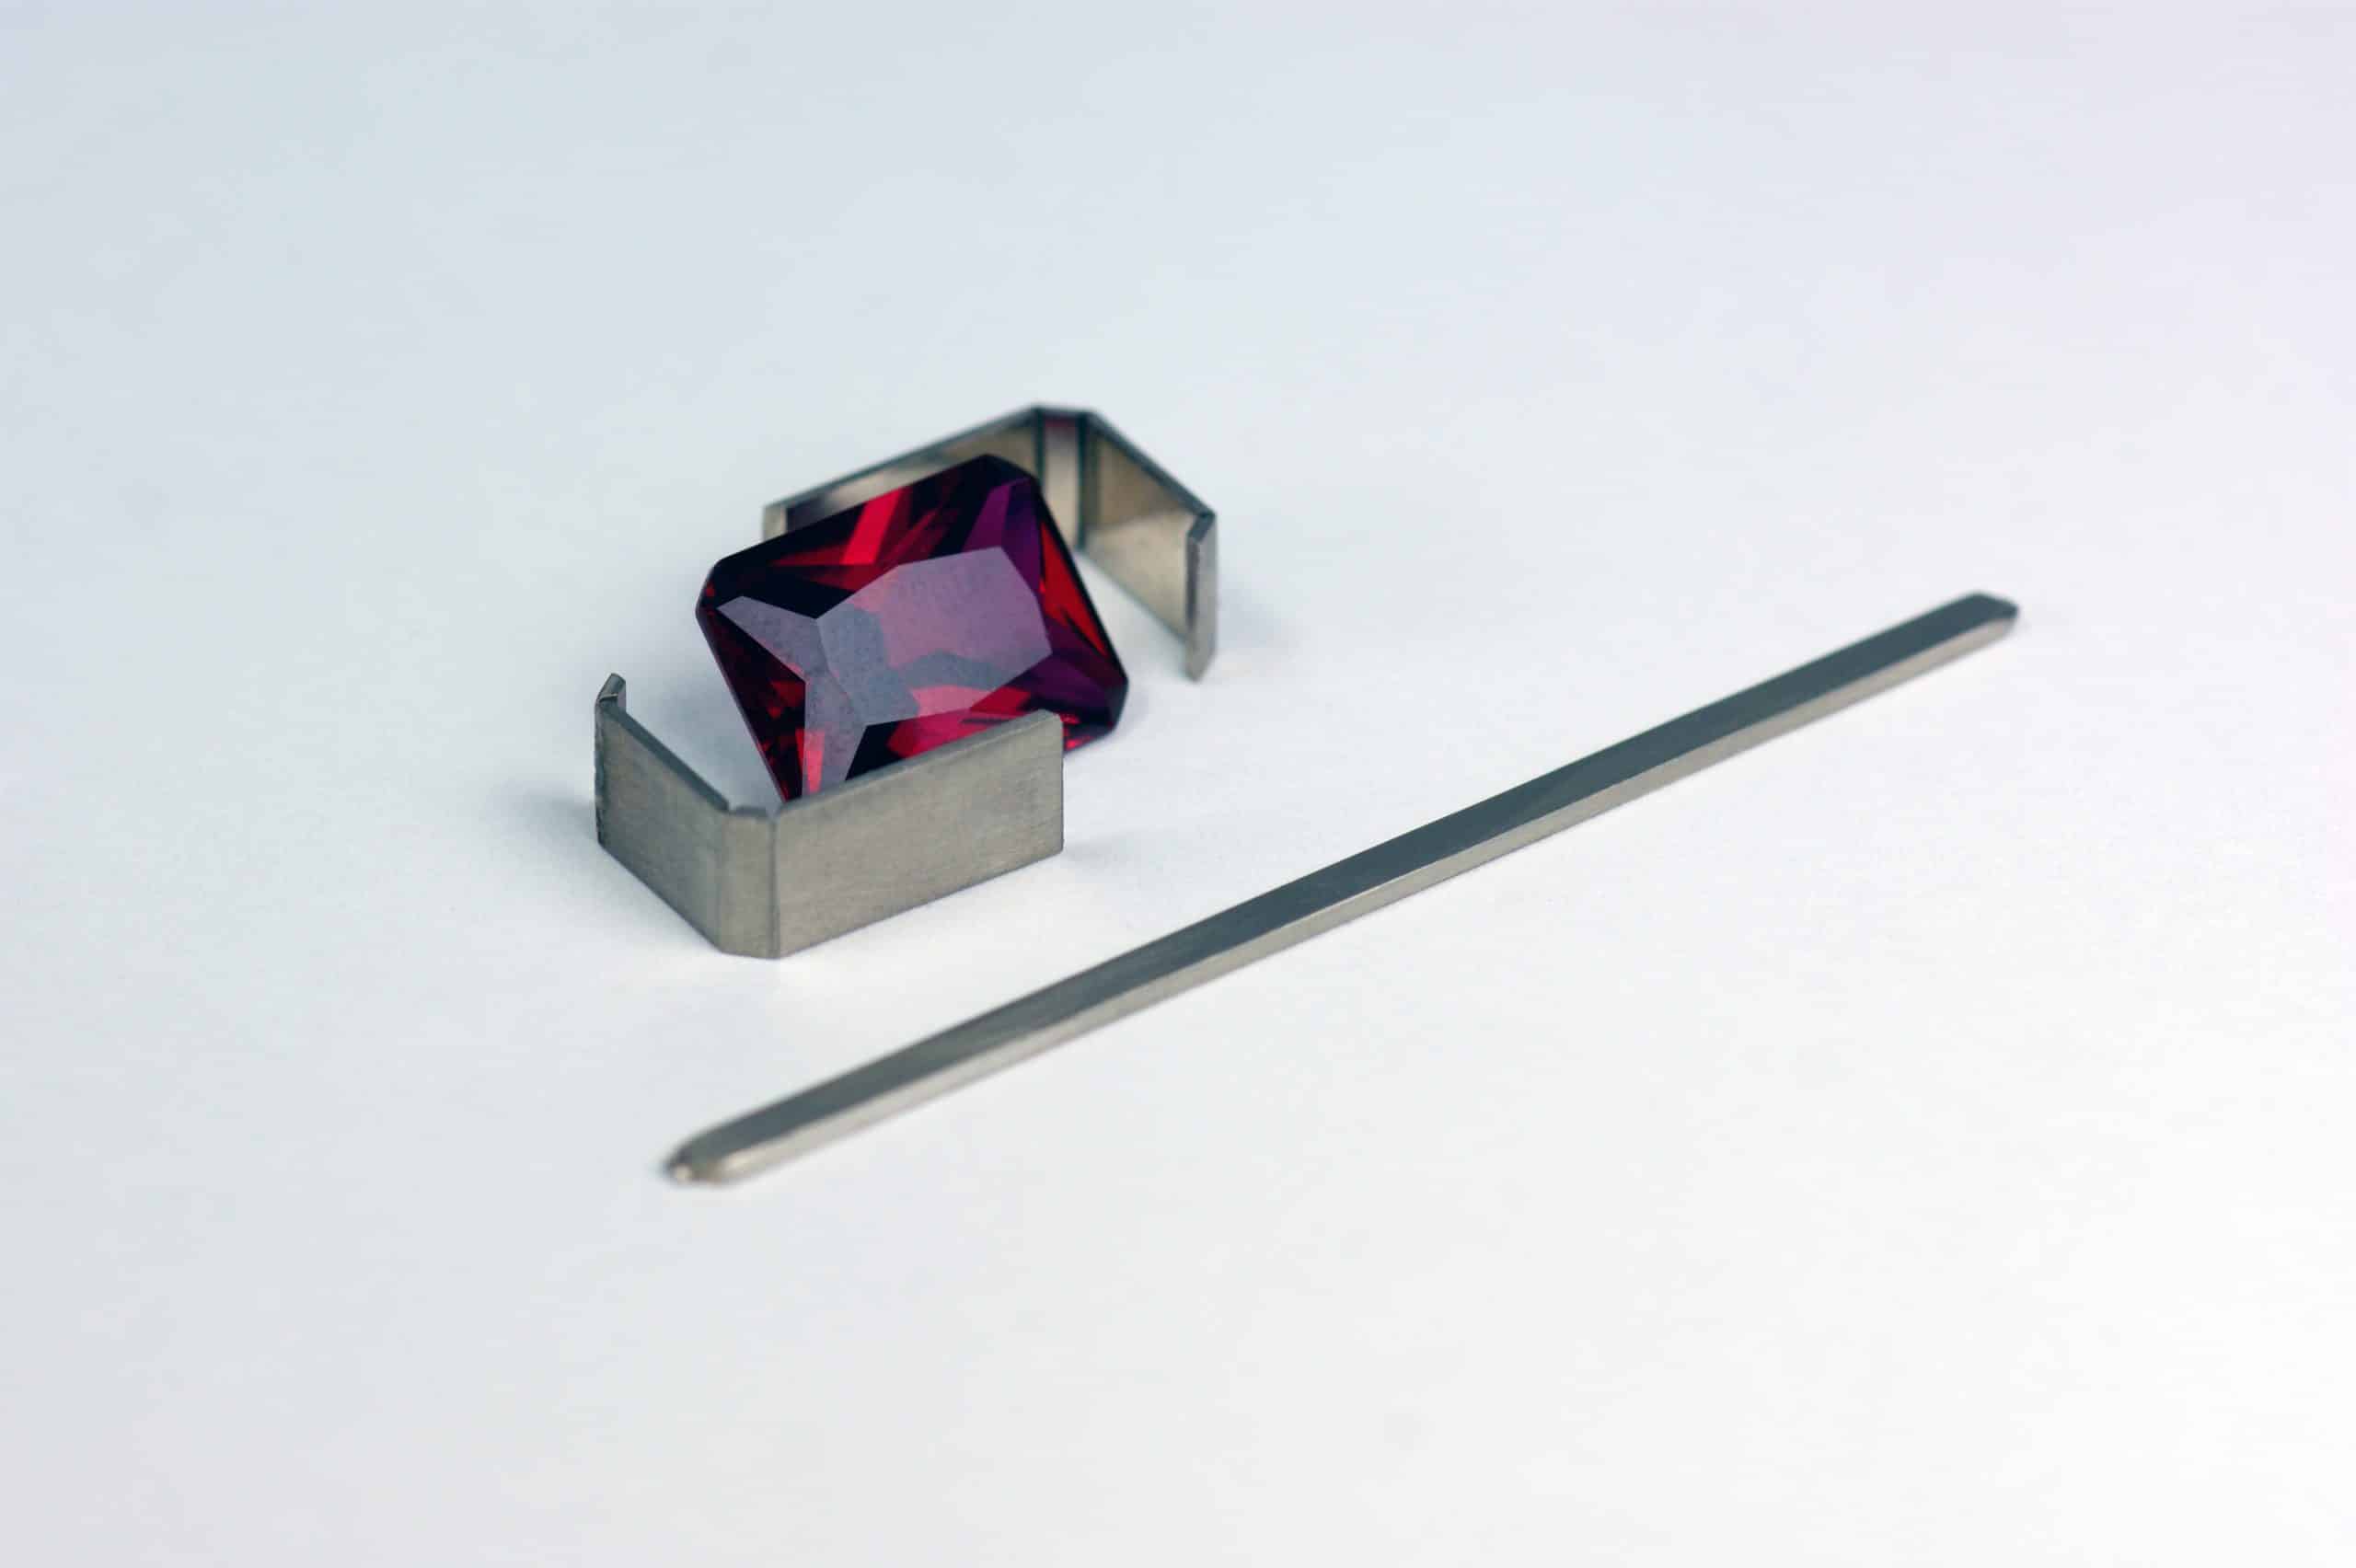
2. Fixation
The frame is tacked together and aligned with a few small welding points.
The stone support should now also be filed in.

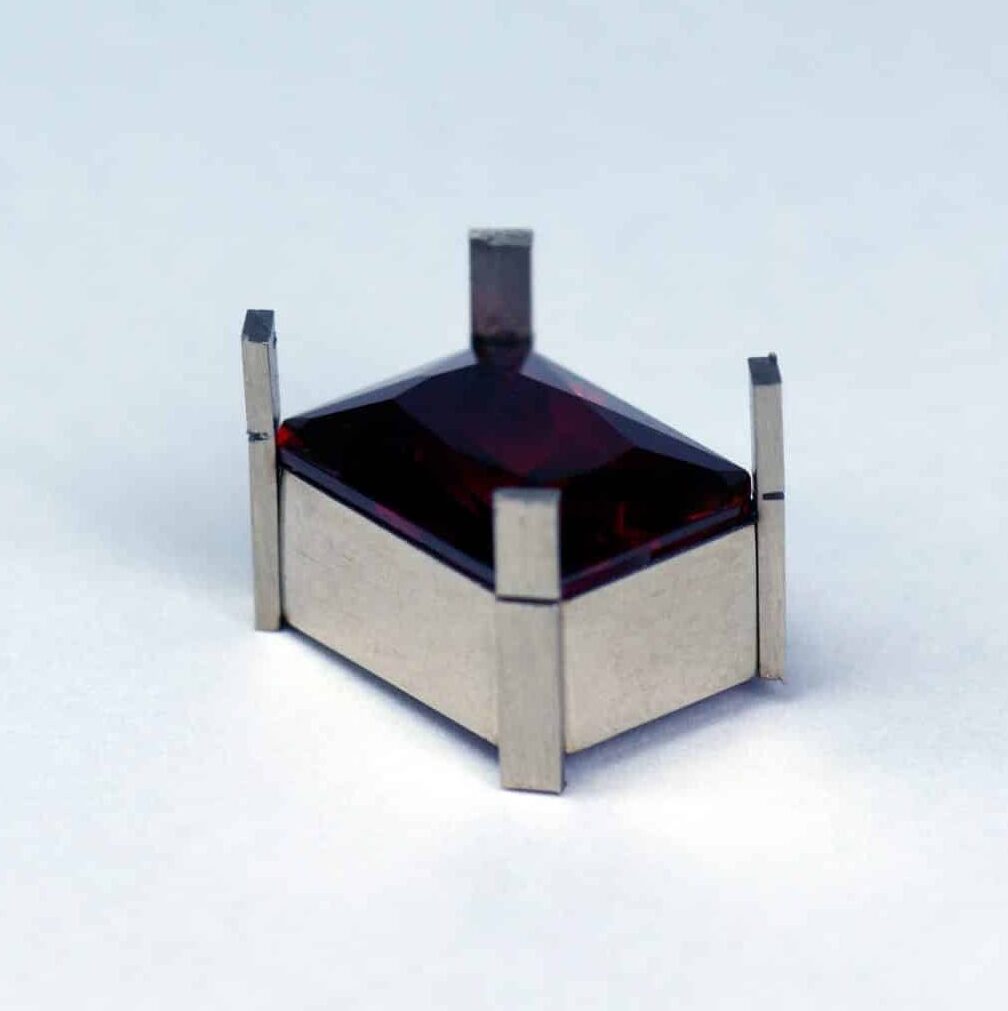
3. Attaching the claws
The claws are sawn in at the height of the rondel.
With the stone in place, the position of the prongs can now be precisely determined. A few stapling points on the back and inside of the setting are now used to staple them.
4. Soldering
As all parts are now firmly fixed by the spot welds, the socket can also be easily connected with brazing solder without the need for binding wire.

5. Inserting the stone
The setting can now be trimmed and polished. The stone is inserted and the simple The claws to be bent are pressed over the surface of the stone. Before further processing the resulting joints must be metallically bright.

6. Welding
The joint is now filled with an additional material of the same type in the form of a welding wire.
To protect porous or treated stone surfaces in particular from welding vapors, a piece of paper or a piece of fabric tape can be placed between the stone and the crab if necessary.

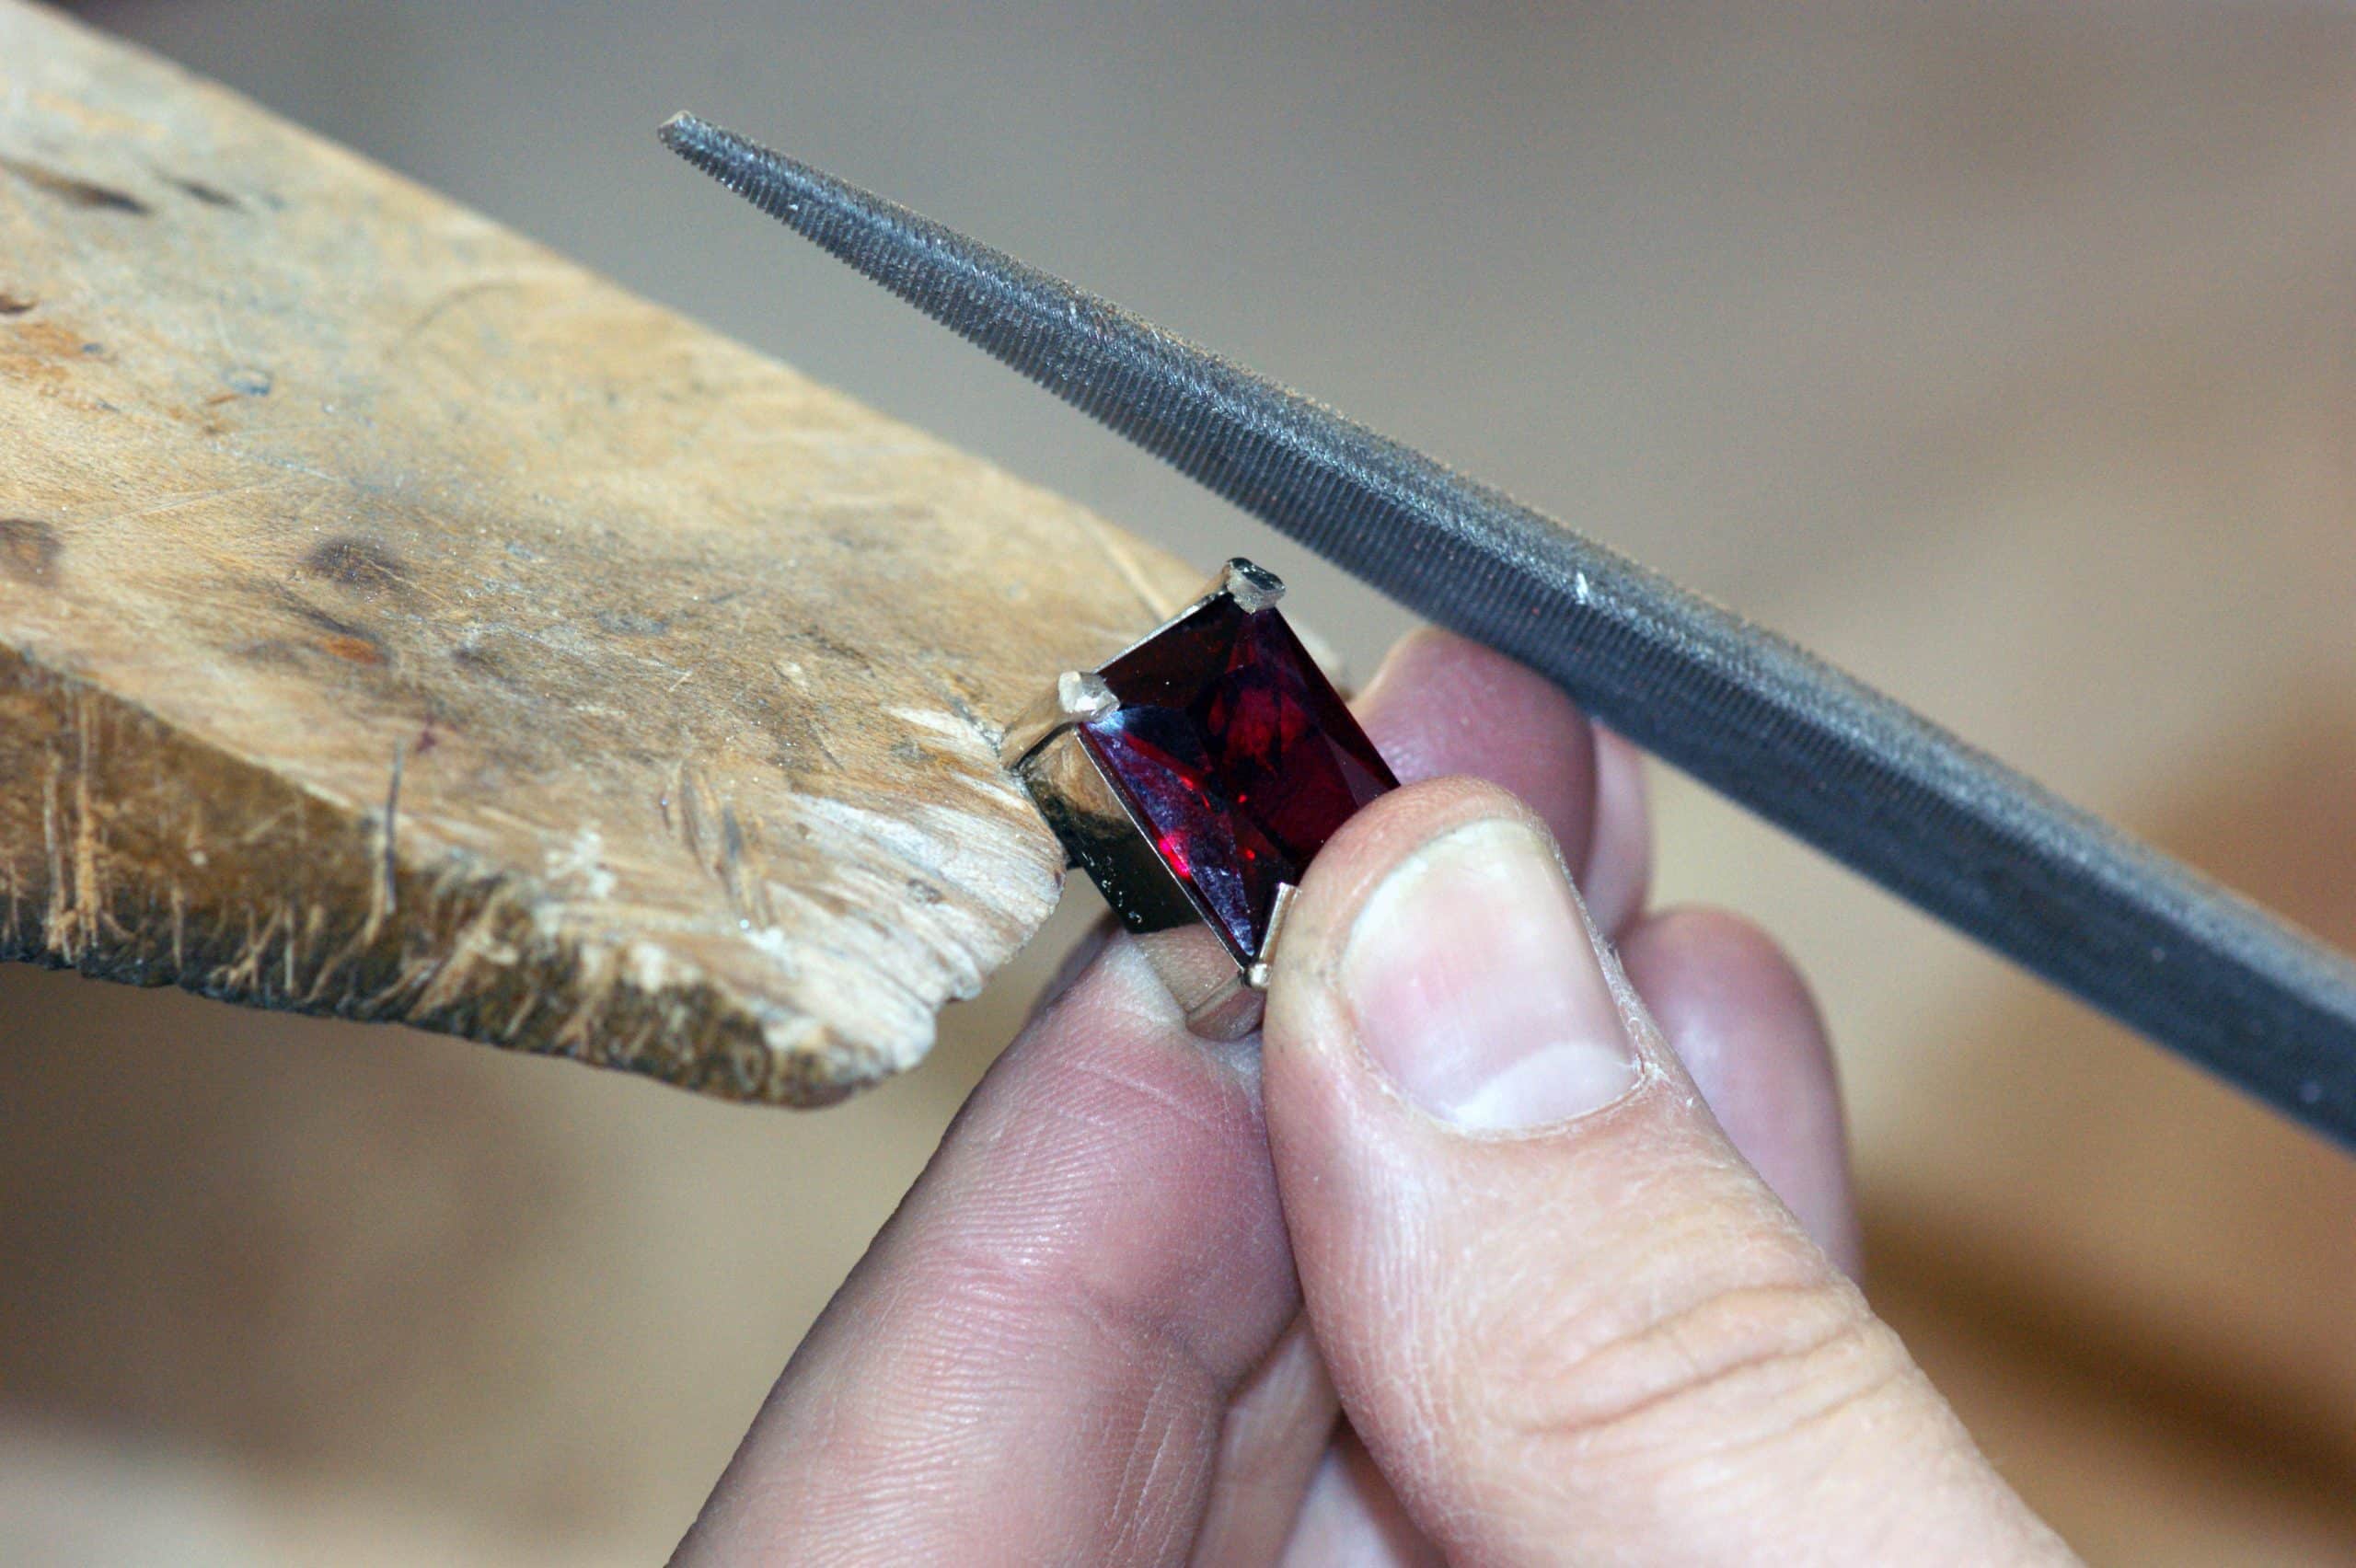
7. Customizing
The claws are now shortened to the appropriate length and filed. No further setting of the stone is necessary.
8th finish
The studs are then trimmed and the final polish can be applied.
Due to the use of the same type of material to fill the joints, no color difference is visible on the studs.
